> ## Documentation Index
> Fetch the complete documentation index at: https://wb-21fd5541-feat-cli-docs-generator.mintlify.site/llms.txt
> Use this file to discover all available pages before exploring further.
# チュートリアル: プロジェクトから sweep ジョブを作成する
> 既存の W&B プロジェクトから sweep ジョブを作成する方法に関するチュートリアル。
このチュートリアルでは、既存の W\&B プロジェクトからスイープジョブを作成する方法を説明します。PyTorch の畳み込みニューラルネットワークを用いて画像を分類するために [Fashion MNIST dataset](https://github.com/zalandoresearch/fashion-mnist) を使用します。必要なコードとデータセットは、W\&B のリポジトリにあります:[https://github.com/wandb/examples/tree/master/examples/pytorch/pytorch-cnn-fashion](https://github.com/wandb/examples/tree/master/examples/pytorch/pytorch-cnn-fashion)
この [W\&B ダッシュボード](https://app.wandb.ai/carey/pytorch-cnn-fashion) で結果を探索してください。
## 1. プロジェクトを作成する
最初にベースラインを作成します。W\&B の GitHub リポジトリから PyTorch MNIST データセットの例モデルをダウンロードします。次に、モデルをトレーニングします。そのトレーニングスクリプトは `examples/pytorch/pytorch-cnn-fashion` ディレクトリーにあります。
1. このリポジトリをクローンします `git clone https://github.com/wandb/examples.git`
2. この例を開きます `cd examples/pytorch/pytorch-cnn-fashion`
3. run を手動で実行します `python train.py`
オプションとして、W\&B アプリ UI ダッシュボードで例を探索します。
[例のプロジェクトページを見る →](https://app.wandb.ai/carey/pytorch-cnn-fashion)
## 2. スイープを作成する
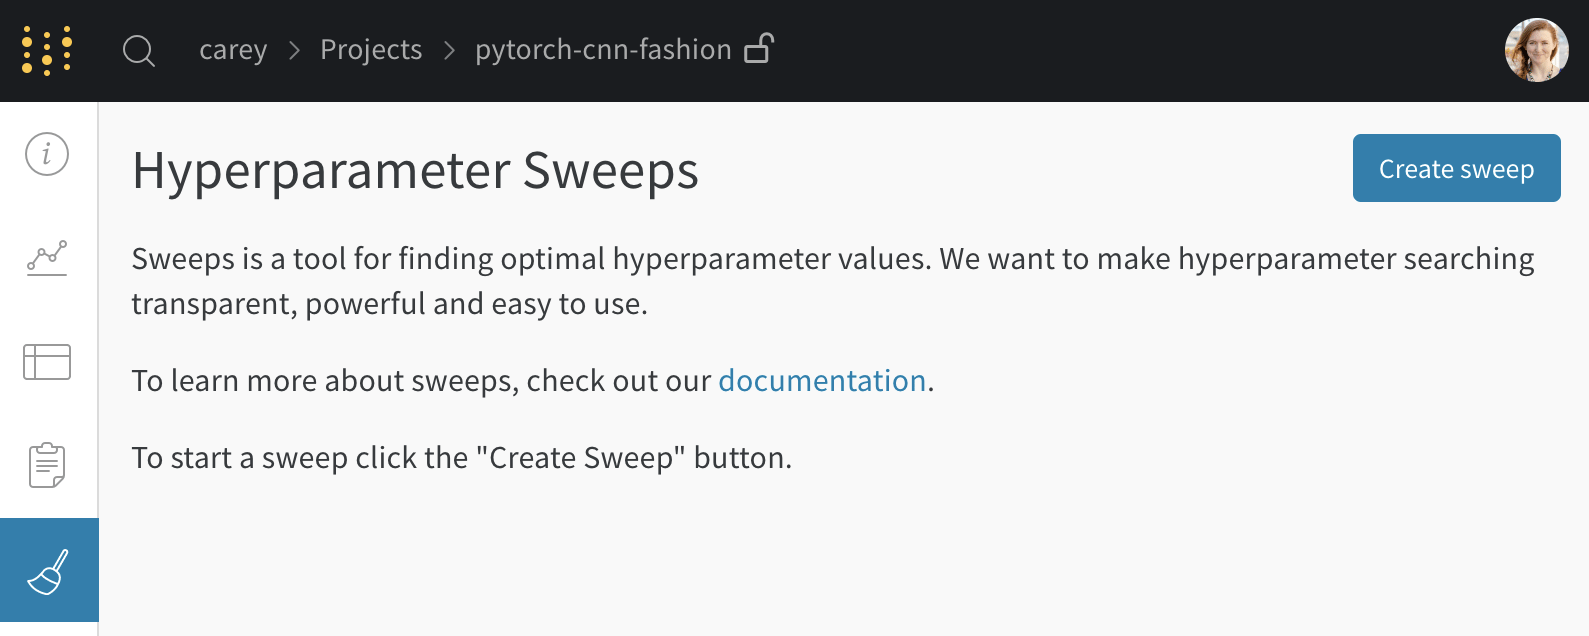
あなたのプロジェクトページから、サイドバーの [Sweep tab](/ja/models/sweeps/sweeps-ui/) を開き、**Create Sweep** を選択します。
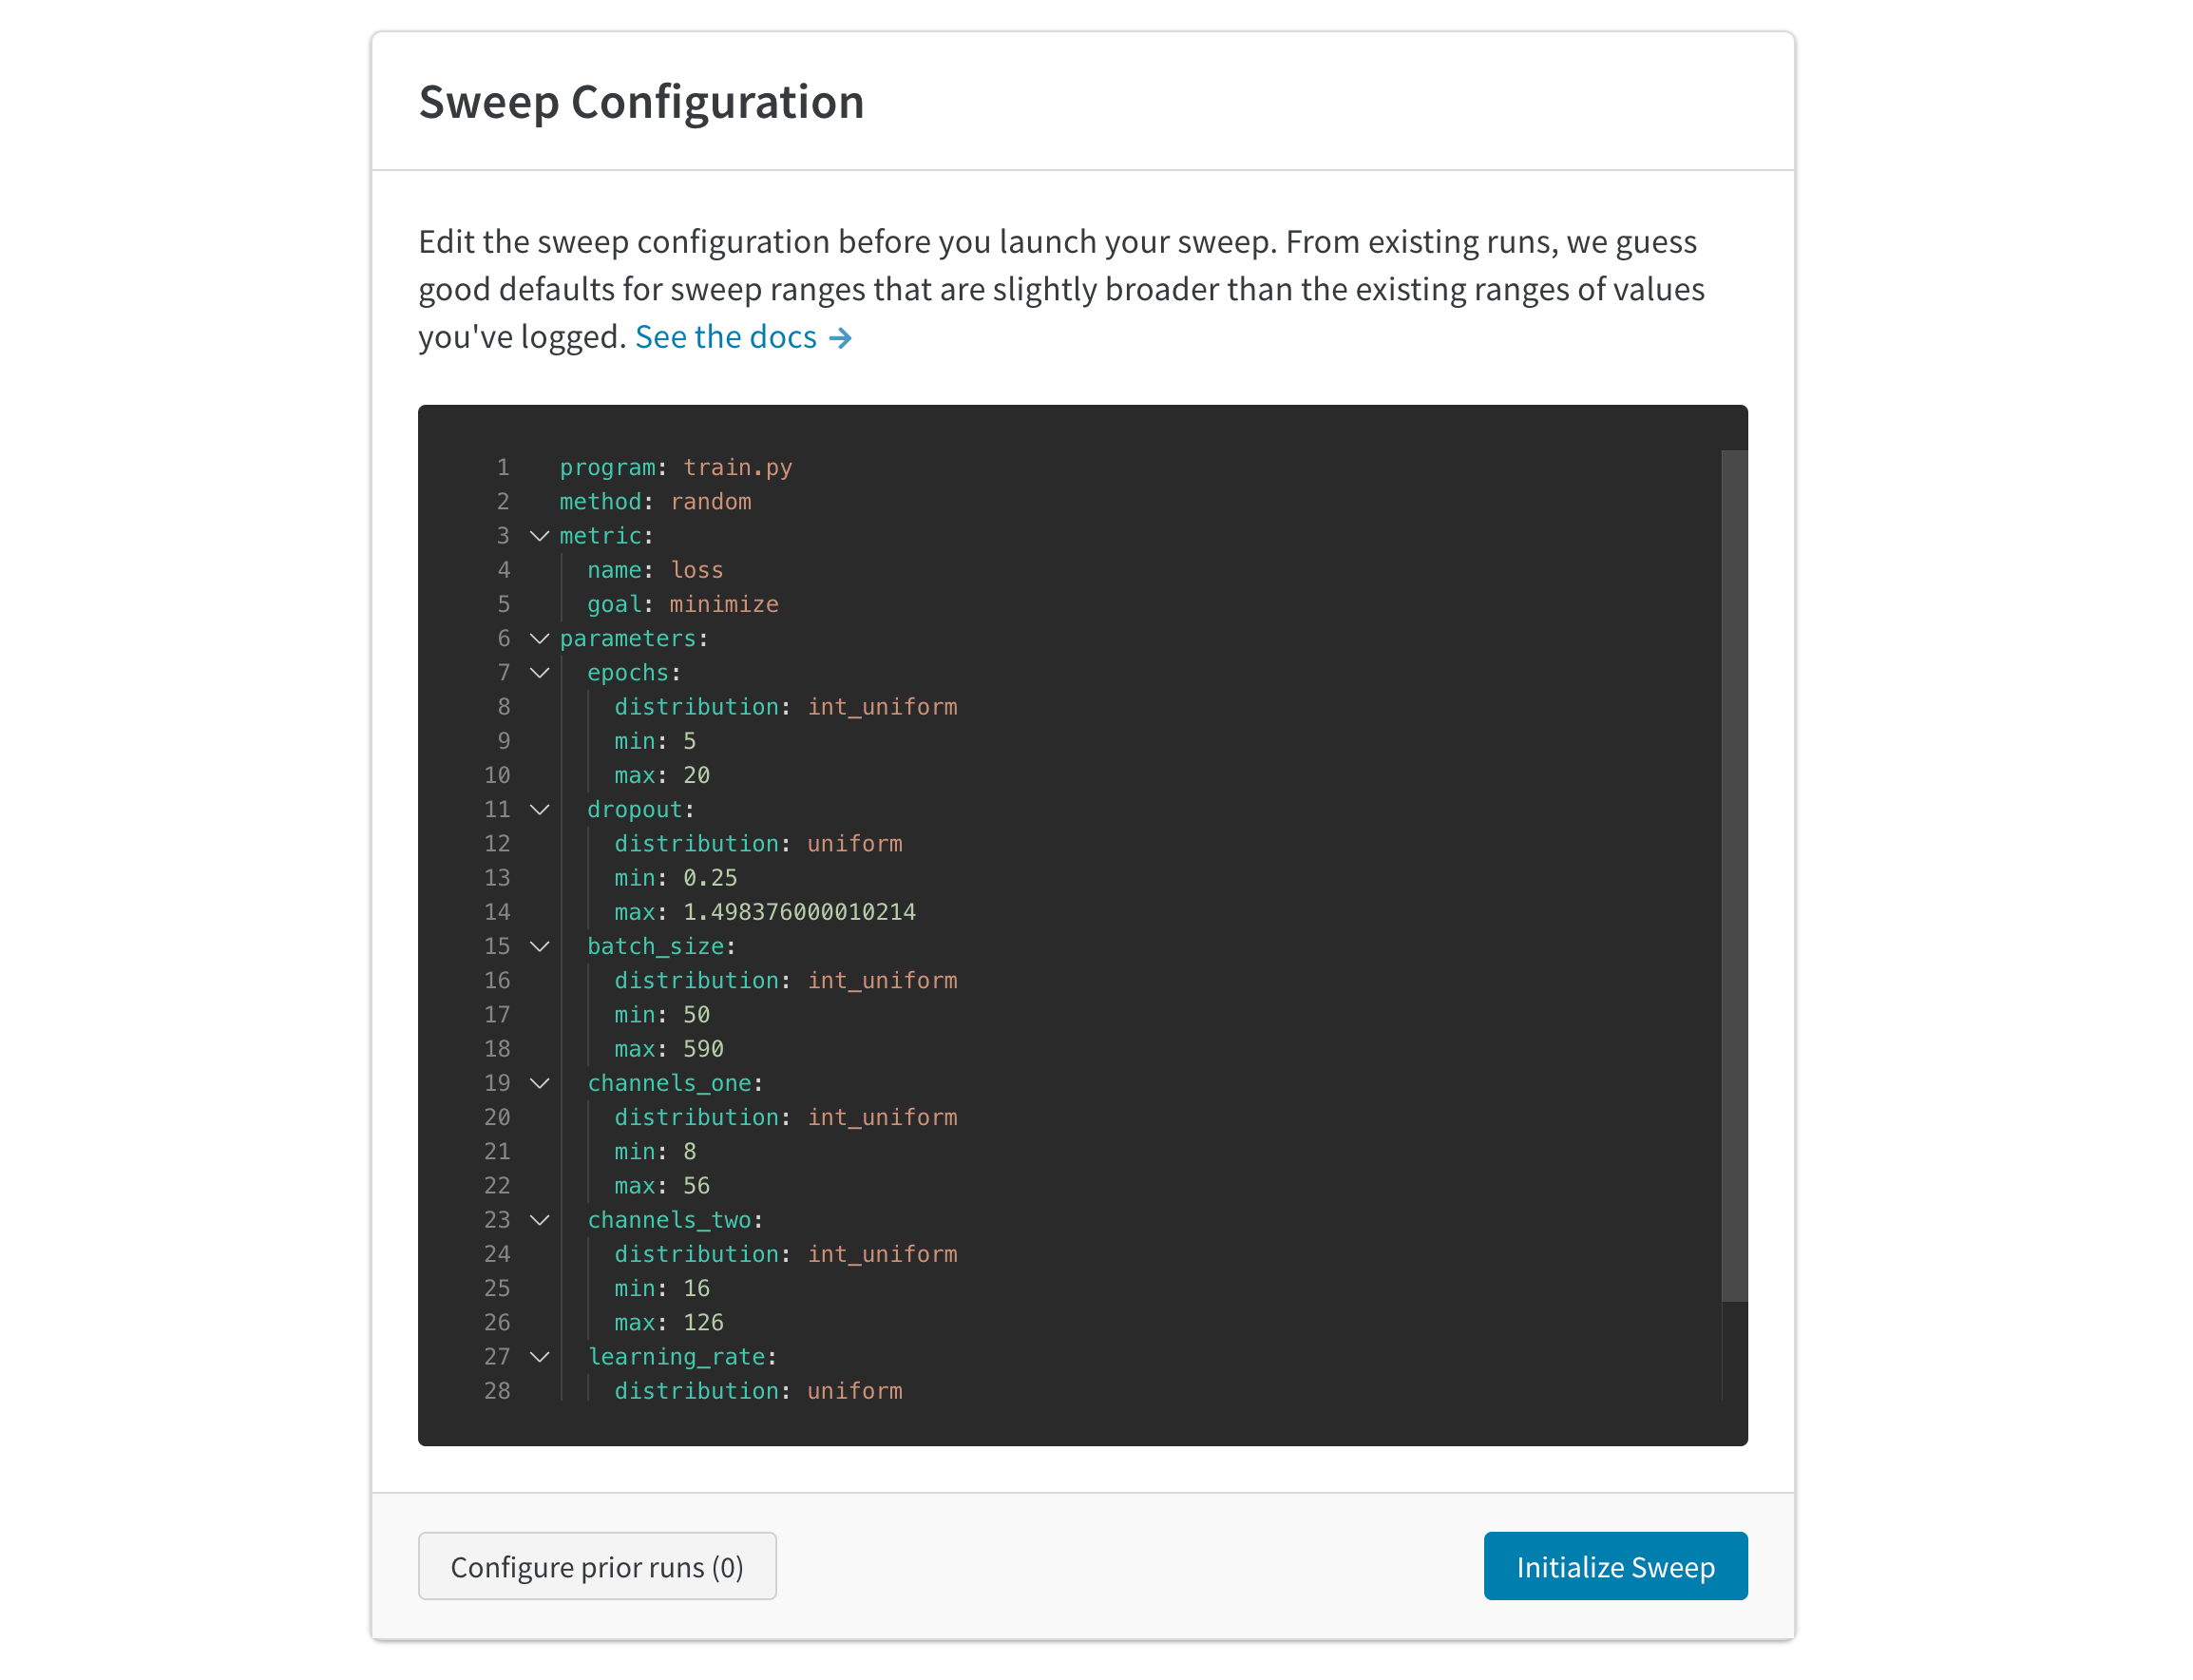
 自動生成された設定は、完了した run に基づいてスイープする値を推測します。試したいハイパーパラメーターの範囲を指定するために設定を編集します。スイープをローンチすると、ホストされた W\&B スイープサーバー上で新しいプロセスが開始されます。この集中サービスは、トレーニングジョブを実行しているエージェント(機械)を調整します。
 ## 3. エージェントをローンチする
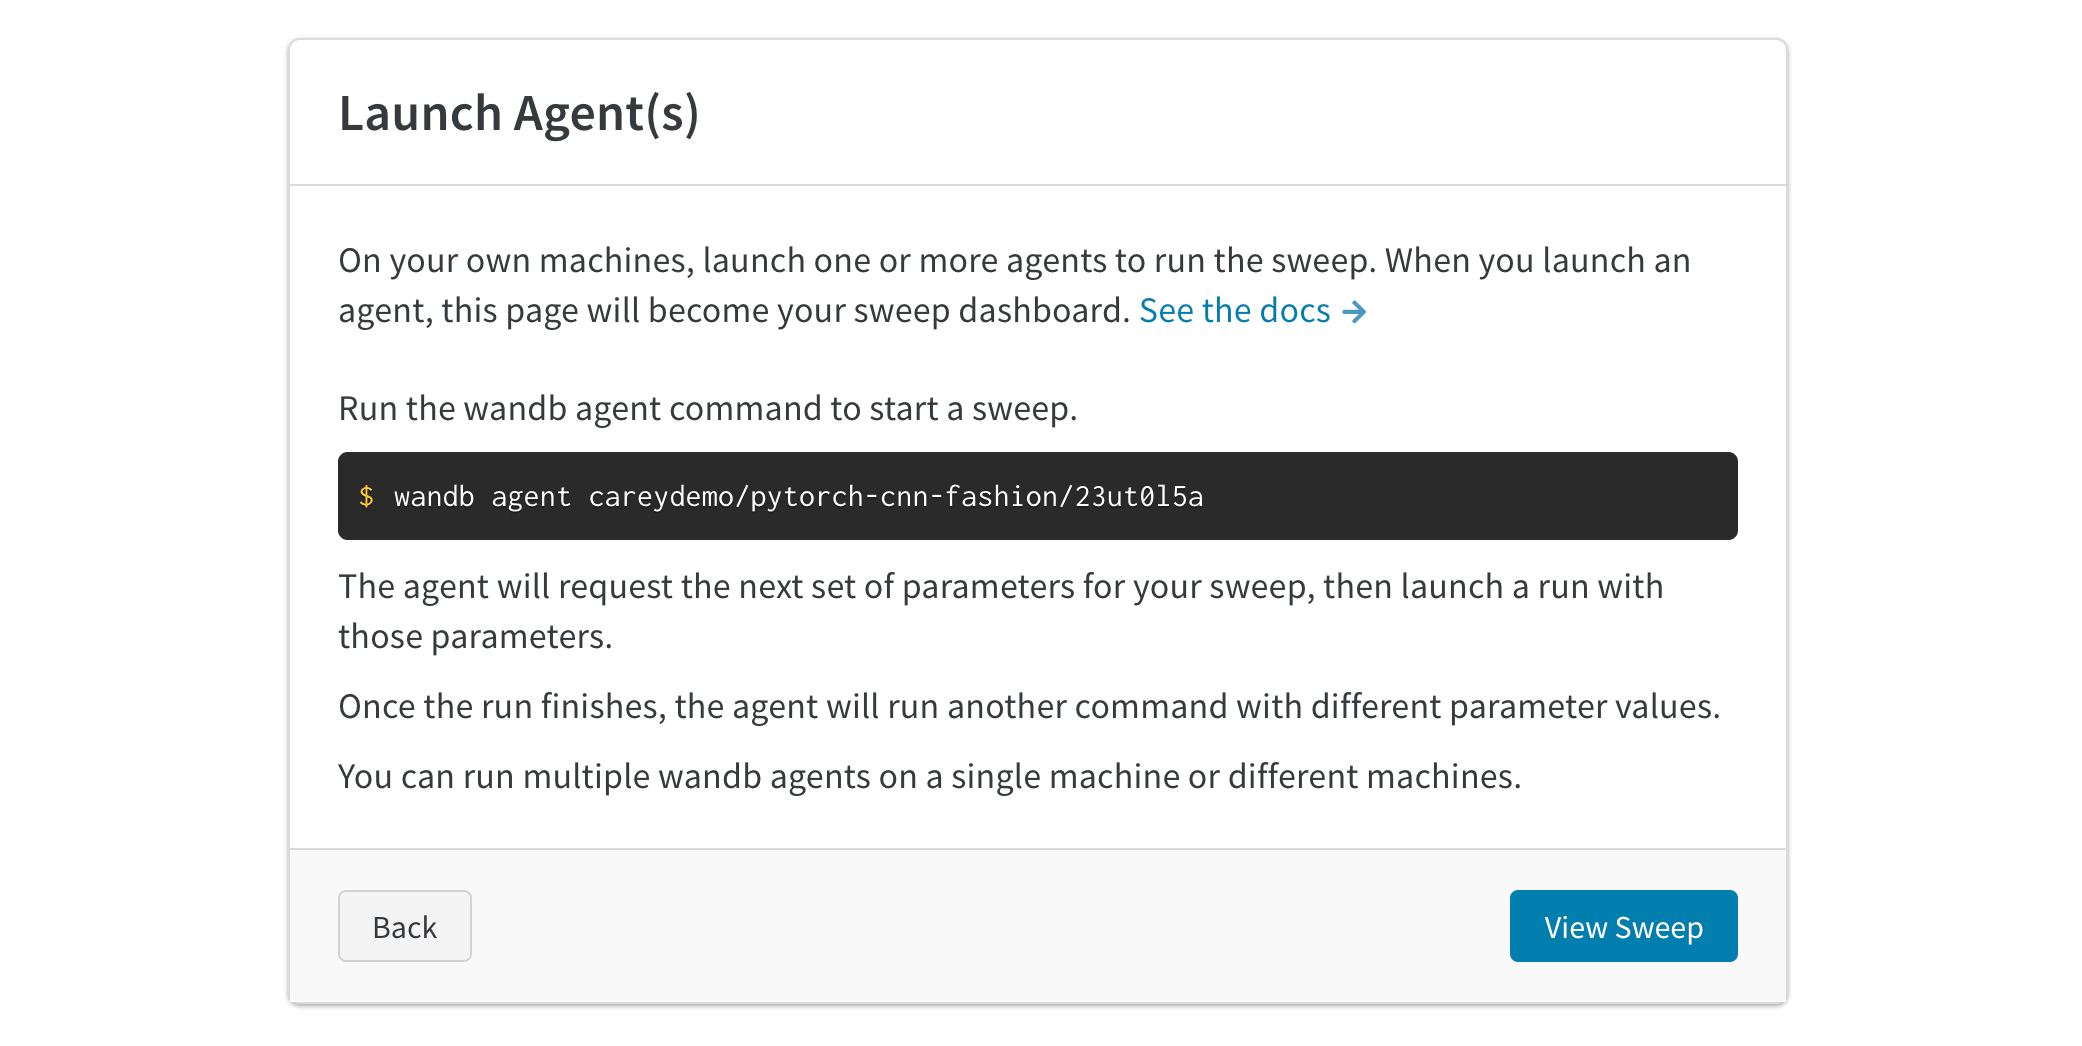
次に、ローカルでエージェントをローンチします。作業を分散してスイープジョブをより早く終わらせたい場合は、最大20のエージェントを異なるマシンで並行してローンチすることができます。エージェントは、次に試すパラメータのセットを出力します。
## 3. エージェントをローンチする
次に、ローカルでエージェントをローンチします。作業を分散してスイープジョブをより早く終わらせたい場合は、最大20のエージェントを異なるマシンで並行してローンチすることができます。エージェントは、次に試すパラメータのセットを出力します。
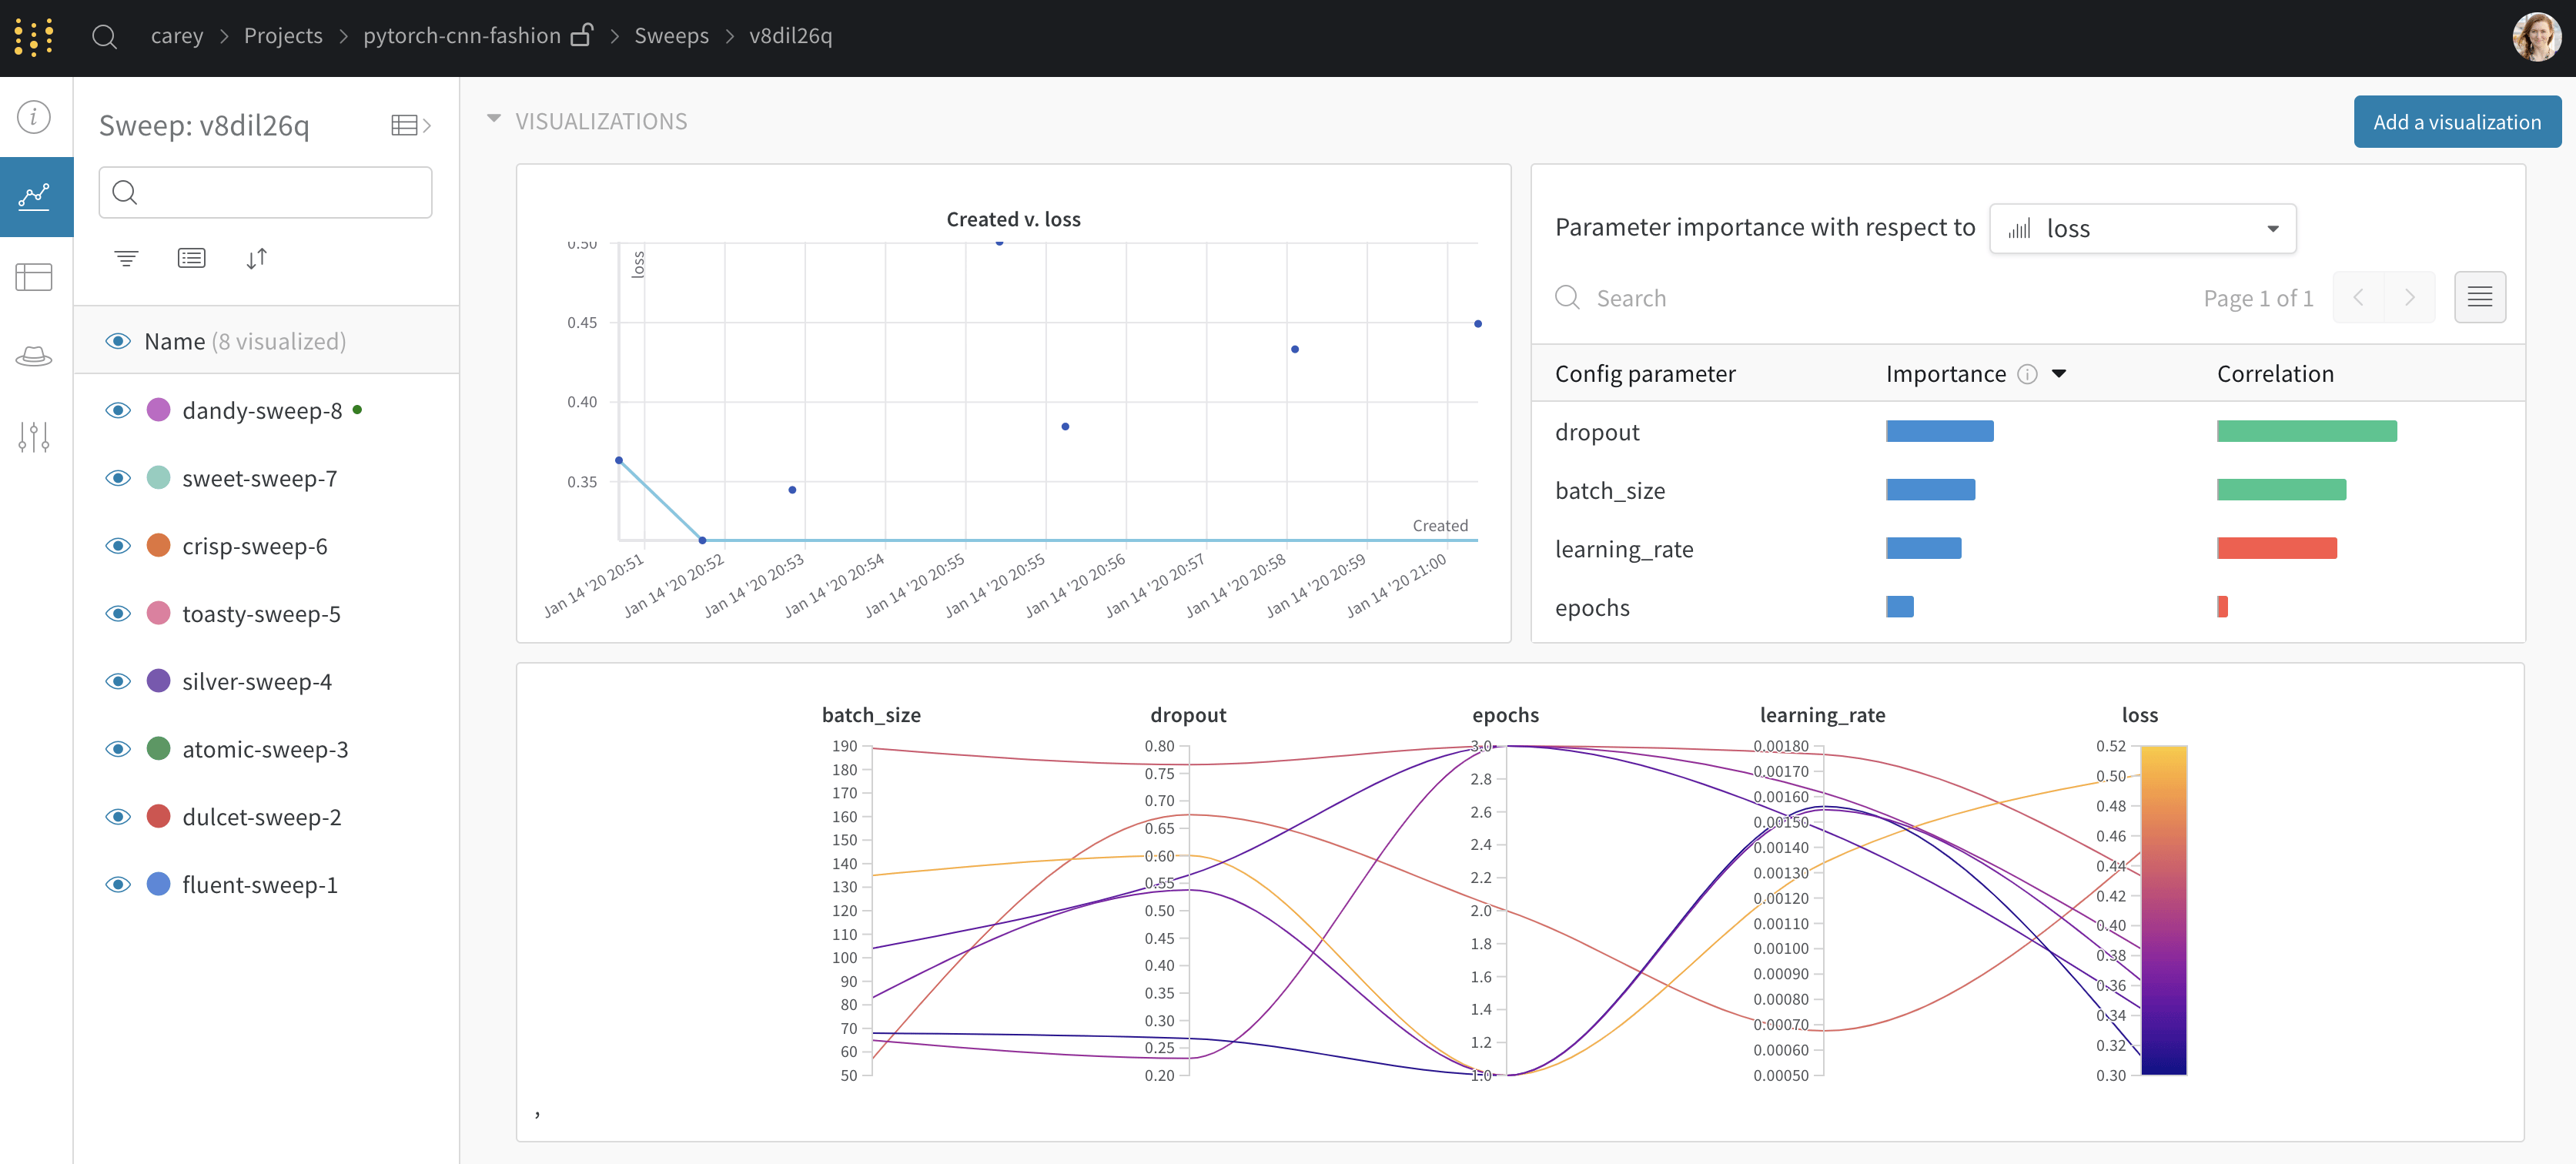
 これで、スイープを実行しています。以下の画像は、例のスイープジョブが実行されているときのダッシュボードがどのように見えるかを示しています。[例のプロジェクトページを見る →](https://app.wandb.ai/carey/pytorch-cnn-fashion)
 ## 既存の run で新しいスイープをシードする
以前にログした既存の run を使用して新しいスイープをローンチします。
1. プロジェクトテーブルを開きます。
2. 表の左側のチェックボックスを使用して使用したい run を選択します。
3. 新しいスイープを作成するためにドロップダウンをクリックします。
スイープはサーバー上に設定されます。run を開始するために、1つ以上のエージェントをローンチするだけです。
## 既存の run で新しいスイープをシードする
以前にログした既存の run を使用して新しいスイープをローンチします。
1. プロジェクトテーブルを開きます。
2. 表の左側のチェックボックスを使用して使用したい run を選択します。
3. 新しいスイープを作成するためにドロップダウンをクリックします。
スイープはサーバー上に設定されます。run を開始するために、1つ以上のエージェントをローンチするだけです。
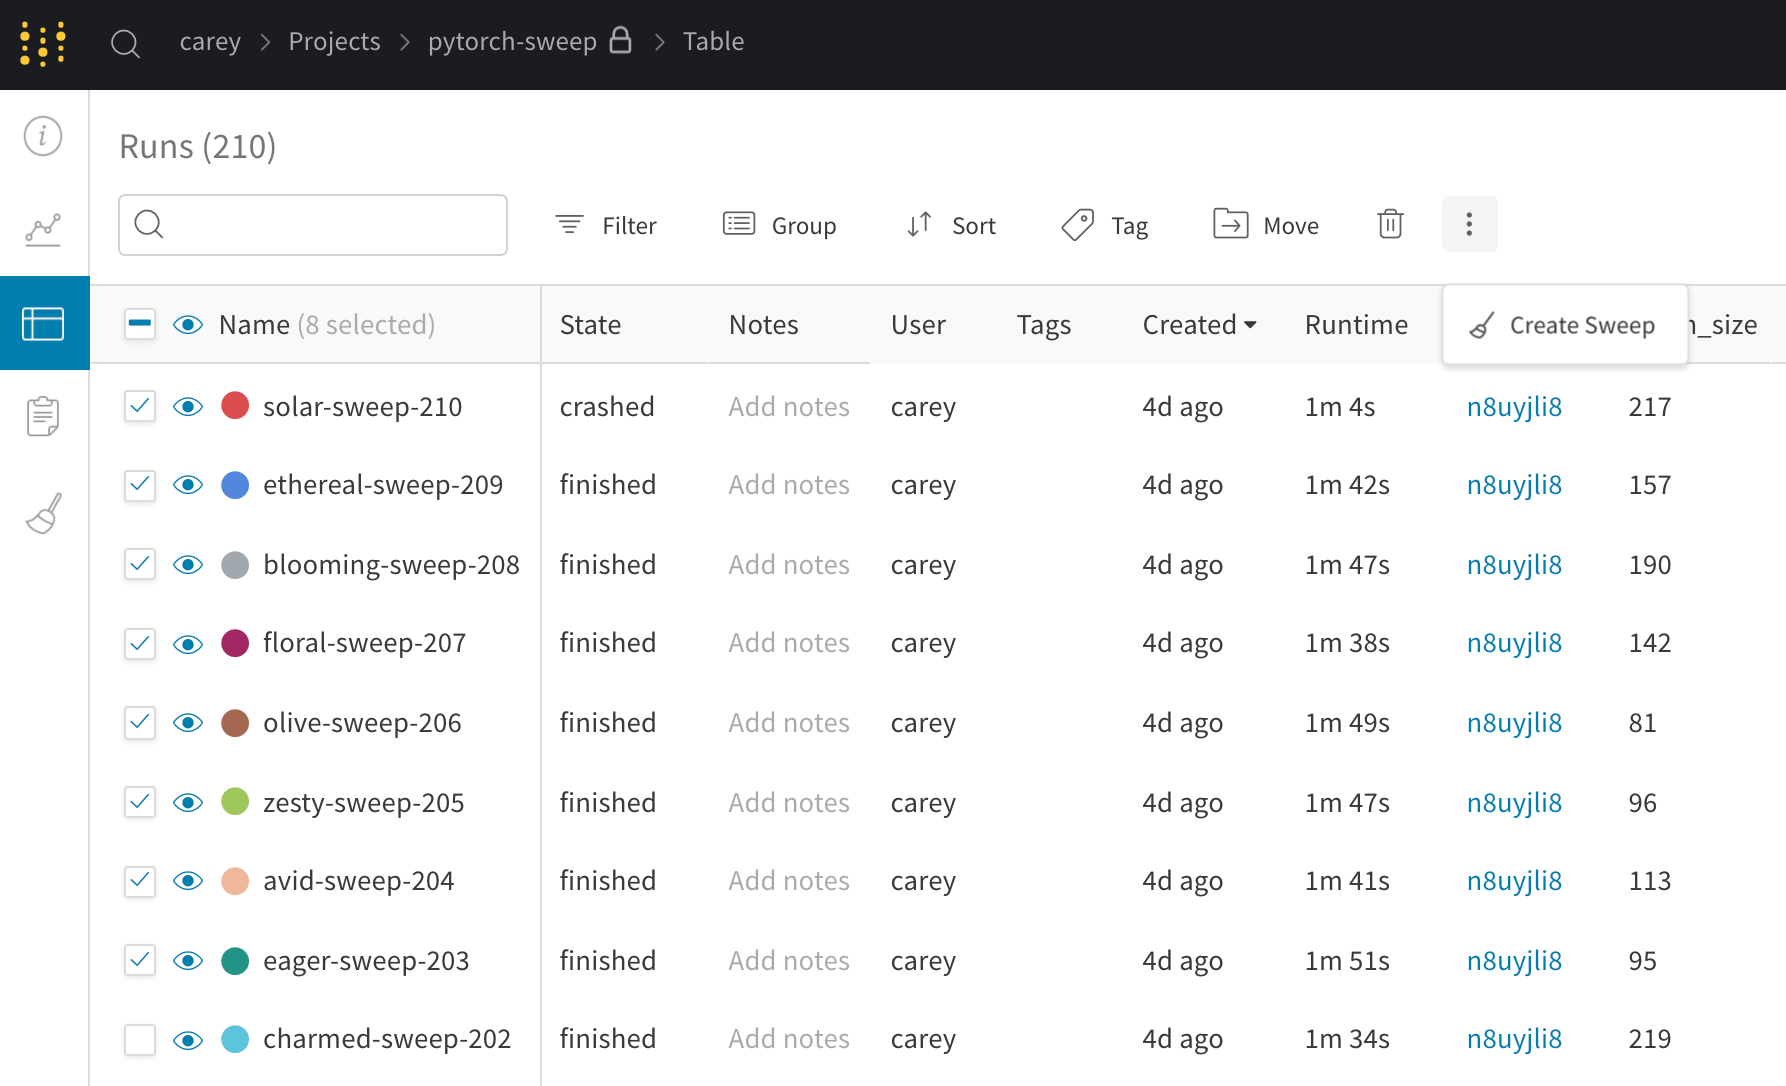 新しいスイープをベイジアンスイープとして開始すると、選択した run はガウスプロセスにもシードされます。