> ## Documentation Index
> Fetch the complete documentation index at: https://wb-21fd5541-feat-cli-docs-generator.mintlify.site/llms.txt
> Use this file to discover all available pages before exploring further.
# Slack アラートの設定
Integrate W\&B Server with [Slack](https://slack.com/).
W\&B 専用クラウドデプロイメントでの Slack アラートの設定を示した[ビデオを見る](https://www.youtube.com/watch?v=JmvKb-7u-oU) (6 分)。
## Slack アプリケーションを作成する
以下の手順に従って Slack アプリケーションを作成してください。
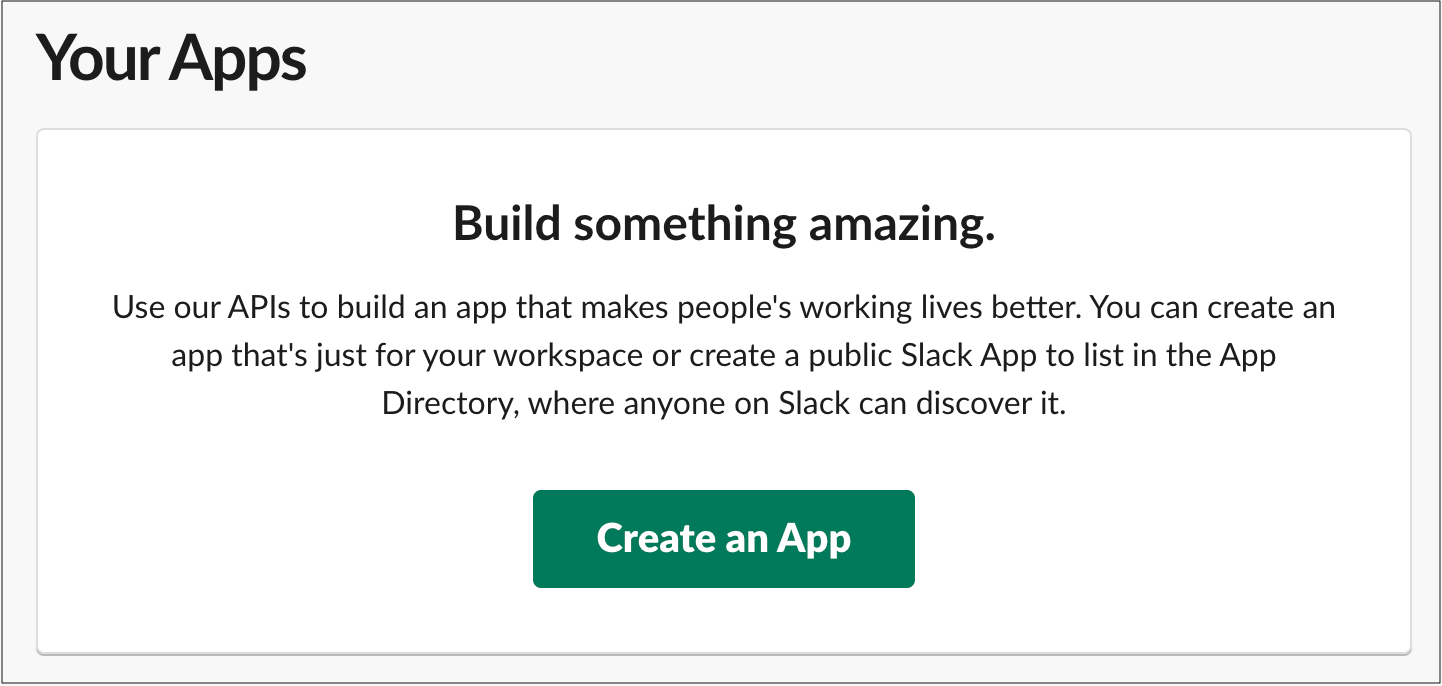
1. [https://api.slack.com/apps](https://api.slack.com/apps) にアクセスし、**Create an App** を選択します。
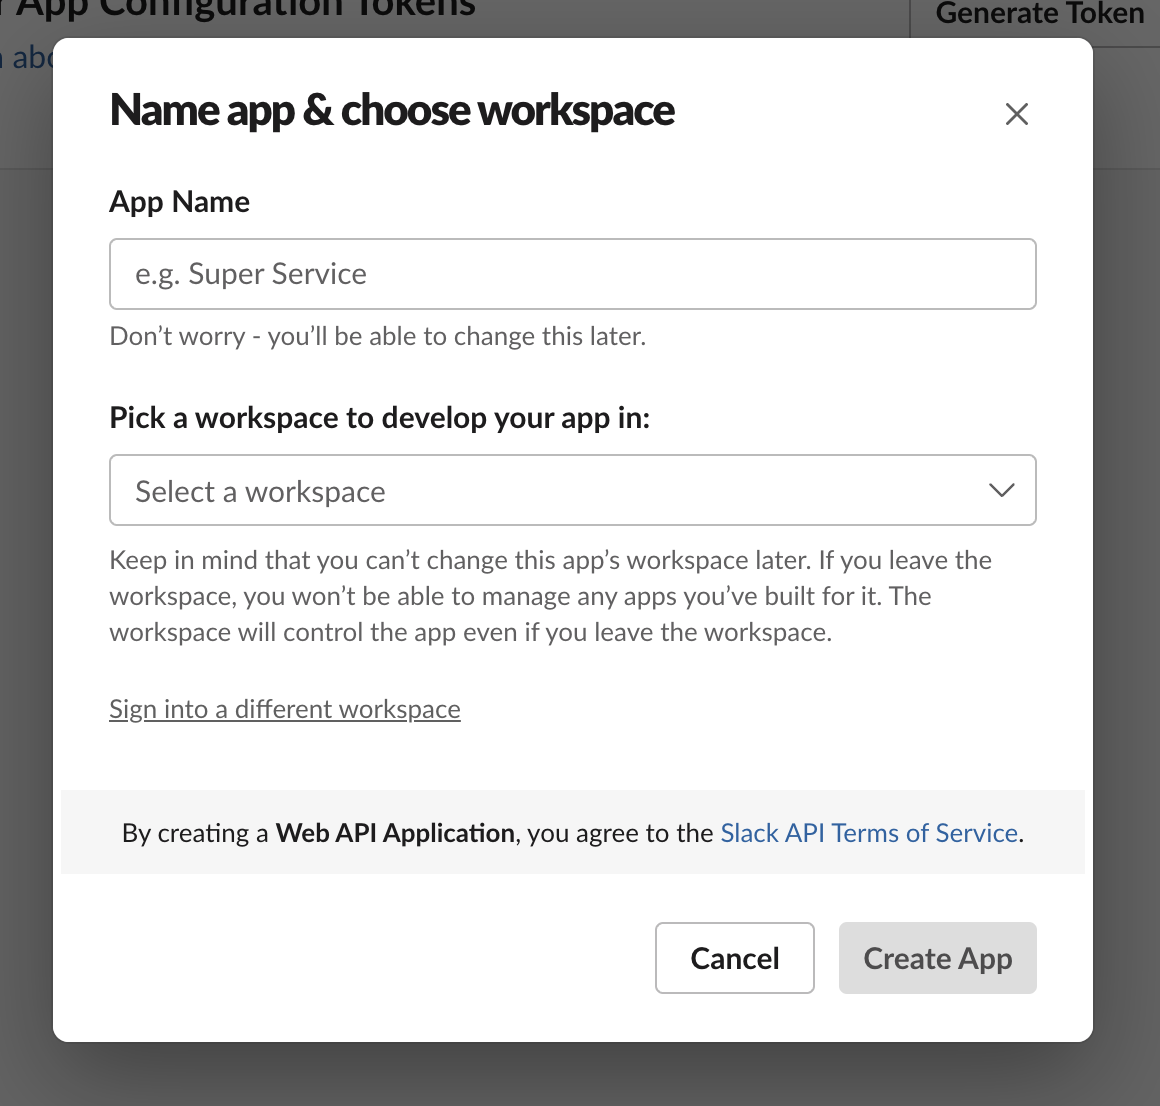
 2. **App Name** フィールドにアプリの名前を入力します。
3. アプリを開発したい Slack ワークスペースを選択します。アラートに使用する予定のワークスペースと同じワークスペースを使用していることを確認してください。
2. **App Name** フィールドにアプリの名前を入力します。
3. アプリを開発したい Slack ワークスペースを選択します。アラートに使用する予定のワークスペースと同じワークスペースを使用していることを確認してください。
 ## Slack アプリケーションを設定する
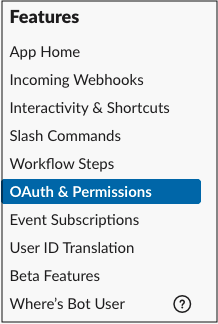
1. 左側のサイドバーで **OAth & Permissions** を選択します。
## Slack アプリケーションを設定する
1. 左側のサイドバーで **OAth & Permissions** を選択します。
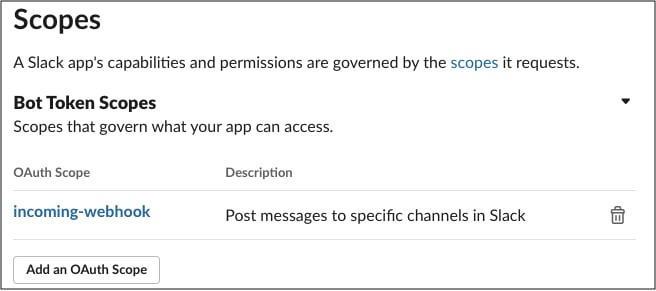
 2. Scopes セクションで、ボットに **incoming\_webhook** スコープを追加します。スコープは、アプリに開発ワークスペースでのアクションを実行する権限を与えます。
Bot の OAuth スコープについての詳細は、Slack API ドキュメントの「Understanding OAuth scopes for Bots」チュートリアルを参照してください。
2. Scopes セクションで、ボットに **incoming\_webhook** スコープを追加します。スコープは、アプリに開発ワークスペースでのアクションを実行する権限を与えます。
Bot の OAuth スコープについての詳細は、Slack API ドキュメントの「Understanding OAuth scopes for Bots」チュートリアルを参照してください。
 3. W\&B インストールを指すようにリダイレクト URL を設定します。ローカルシステム設定で指定されたホスト URL と同じ URL を使用してください。インスタンスへの異なる DNS マッピングを持つ場合は、複数の URL を指定できます。
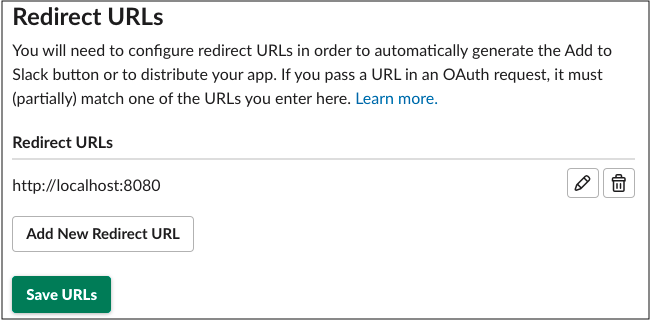 4. **Save URLs** を選択します。
5. **Restrict API Token Usage** で、オプションとして W\&B インスタンスの IP または IP 範囲を許可リストに指定できます。許可された IP アドレスの制限は、Slack アプリケーションのセキュリティをより強化します。
## Slack アプリケーションを W\&B に登録する
1. W\&B インスタンスの **System Settings** または **System Console** ページに移動します。デプロイメントに応じて異なります。
2. 使用している System ページに応じて、以下のオプションのいずれかを実行します:
* **System Console** にいる場合: **Settings** から **Notifications** に進みます。
4. **Save URLs** を選択します。
5. **Restrict API Token Usage** で、オプションとして W\&B インスタンスの IP または IP 範囲を許可リストに指定できます。許可された IP アドレスの制限は、Slack アプリケーションのセキュリティをより強化します。
## Slack アプリケーションを W\&B に登録する
1. W\&B インスタンスの **System Settings** または **System Console** ページに移動します。デプロイメントに応じて異なります。
2. 使用している System ページに応じて、以下のオプションのいずれかを実行します:
* **System Console** にいる場合: **Settings** から **Notifications** に進みます。
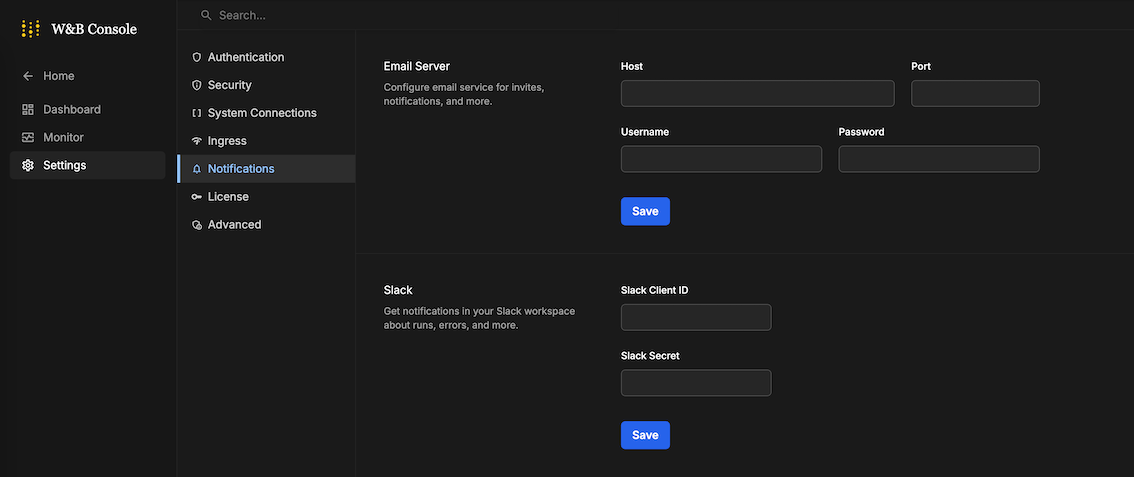 * **System Settings** にいる場合: カスタム Slack アプリケーションを有効にするために **Enable a custom Slack application to dispatch alerts** をトグルします。
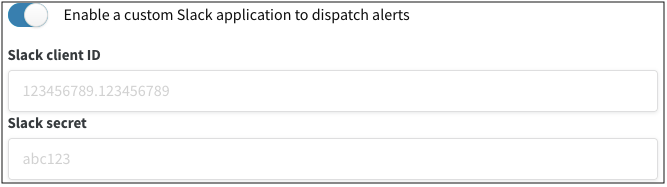 3. **Slack client ID** と **Slack secret** を入力し、**Save** をクリックします。設定の基本情報でアプリケーションのクライアント ID とシークレットを見つけることができます。
4. W\&B アプリケーションで Slack インテグレーションを設定して、すべてが正常に動作していることを確認します。
3. **Slack client ID** と **Slack secret** を入力し、**Save** をクリックします。設定の基本情報でアプリケーションのクライアント ID とシークレットを見つけることができます。
4. W\&B アプリケーションで Slack インテグレーションを設定して、すべてが正常に動作していることを確認します。